Shooting and processing a light-trail image
Photographing is sometimes described as the art of painting with light. Capturing cars at full speed as dusk falls is a good way of letting vehicles paint the strokes for you. From a viewpoint perspective, I’m fortunate to live only a few miles away from a bridge that affords an unimpeded, safe and interesting view of the M3 diverging from the M27 in Hampshire. This is where I shot my image River of fire, which recently trended Popular on 500px.
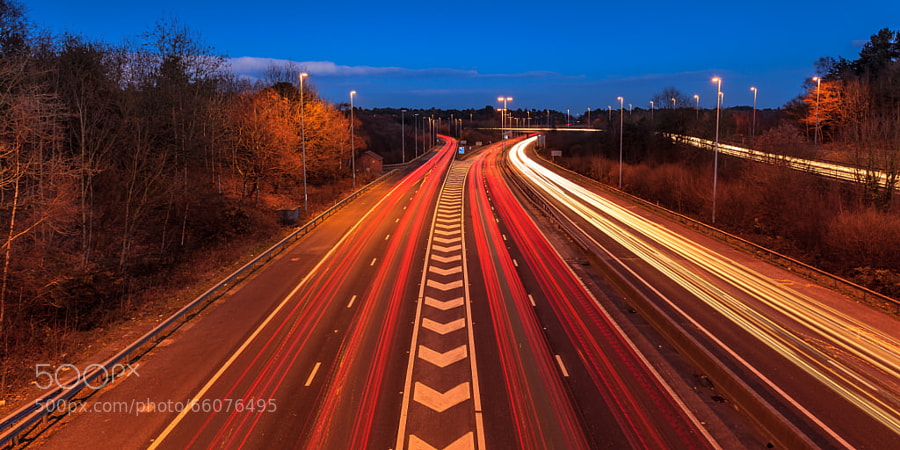
River of fire
Time is key in two respects:
- you need sufficient vehicles to create a reasonable number of trails per exposure – but you certainly don’t want traffic so heavy that it grinds to a halt;
- you need to take your shots at dawn or, more practically, at dusk, so that cars have their lights on without the sky being pitch black.
High summer and mid-winter evenings are thus not so good for this genre – beyond city limits at least – because the sun sets either well before or after rush hour. Later March, however, is ideal because the sun sets at around 7 pm in the UK.
Post-processing is unavoidable because you need to combine several exposures. In this instance, I used six 10-second exposures taken at f11 with an ISO value of 100.
It goes without saying that shooting raw files will yield better results. This is how I do it:
- In Lightroom or Adobe Camera Raw, optimise the first one and sync your Develop settings with the other files.
- Open them all as Layers in Photoshop and move the one with fewest trails to the bottom of the stack.
- Use the Align feature in Photoshop to prevent blurring of road markings, signs and so on.
- Change the blending mode of the rest of them to Soft Light so that all the trails show through.
- Mask out any trails from high-sided vehicles, which obscure road markings.
- Clone out any roadside litter or other distractions from the base layer.
- Flatten the image, save it and return to Lightroom, where you can make any further global edits necessary to your final image.
I hope you found this useful. Feel free to share links to your light trail images and tips about processing them in the Comments.